Using Hugging Face Datasets
Summary
Machine learning operates on data. Essentially, it processes data to extract meaningful information, which can then be used to make intelligent decisions. This is the foundation of Artificial Intelligence. The more data you have the better your machine learning apps will be. There is a caveat though the data has to be high quality. The more data you have and the higher quality the better your apps will be.
The Hugging Face Datasets library provides easy access to thousands of ML datasets covering text, images, and structured data.
What You’ll Learn
- How to find and load datasets from Hugging Face
- How to filter, process, and transform datasets
- How to save datasets in different formats (CSV, Arrow, Parquet)
- How to create and update your own dataset
- How to use Git and the Hugging Face CLI for dataset management
By the end of this post, you will understand Hugging Face Datasets, how to configure them, and how to use them effectively. You will also learn a little about pandas.
Loading, Processing, and Analyzing Hugging Face Datasets
1️⃣ Choosing a dataset
For this tutorial I will be working with
1-800-SHARED-TASKS/COLING-2025-GENAI-MULTI
This is a large dataset of human and AI generated text in English and Chinese.
How do you find a dataset?
- Decide on the task you are going to perform.
- Look at recent related papers and the dataset(s) they chose for their research. The reasoning here is that they will generally chose more modern and well vetted datasets.
- Follow the likes and downloads on Hugging Face for example Trending Text Datasets
- If you cant find what you may need then build your own.
2️⃣ Loading a Dataset
Before we begin, install the Hugging Face datasets package:
pip install datasets pandas
Next we will load and view the dataset
from datasets import load_dataset, DatasetDict
import pandas as pd

# Load the dataset
dataset = load_dataset("1-800-SHARED-TASKS/COLING-2025-GENAI-MULTI")

# Print dataset structure
print(dataset)
Output:
DatasetDict({
    train: Dataset({
        features: ['id', 'source', 'sub_source', 'lang', 'model', 'label', 'text'],
        num_rows: 674083
    })
    validation: Dataset({
        features: ['id', 'source', 'sub_source', 'lang', 'model', 'label', 'text'],
        num_rows: 288894
    })
})
Hugging Face stores the dataset as a DatasetDict, which includes train and test splits.
Note: not all datasets follow the same format so you will need to check.
Most datasets have a card, a home page with a brief description of that the dataset is how it was generated and what its intended use is.
You can also view details of the dataset, search the dataset and see what models were trained on this dataset.
Understanding Dataset Splits
A split is a specific subset of a dataset like train and test. List a dataset’s split names with the get_dataset_split_names() function:
from datasets import load_dataset, get_dataset_split_names

names = get_dataset_split_names("cornell-movie-review-data/rotten_tomatoes")

print(names)

## load a specific split
dataset = load_dataset("cornell-movie-review-data/rotten_tomatoes", split="train")
['train', 'validation', 'test']
Configurations
Some datasets contain several sub-datasets. These sub-datasets are known as configurations or subsets, and you must explicitly select one when loading the dataset.
Use the get_dataset_config_names() function to retrieve a list of all the possible configurations available to your dataset:
from datasets import get_dataset_config_names

configs = get_dataset_config_names("PolyAI/minds14")
print(configs)
['cs-CZ', 'de-DE', 'en-AU', 'en-GB' ... 'all']
3️⃣ Exploring the Dataset
After loading the dataset, inspect its contents:
# Check the first sample
print(dataset["train"][0])
Output:
{'title': 'Study of coupling loss ...', 'word_count': 280}
️ id → The id for the entry
️ source → The source
️ sub_source → The paper title
model → Model use the generate the data
️ label → 1 (AI), 0 (Human)
text → the relevant text
# Assuming dataset is already loaded as 'dataset'
# Convert to Pandas DataFrame
train_df = dataset["train"].to_pandas()
val_df = dataset["validation"].to_pandas()

# Find unique values
unique_sources = train_df['source'].unique()
unique_sub_sources = train_df['sub_source'].unique()
unique_models = train_df['model'].unique()

# Display results
print("Unique Sources:", unique_sources)
print("Unique Sub-Sources:", unique_sub_sources)
print("Unique Models:", unique_models)
Unique Sources: ['m4gt' 'mage' 'hc3']
Unique Sub-Sources: ['arxiv' 'wp' 'xsum' 'open_qa' ...]
Unique Models: ['human', 'gpt4' ...]
Dataset Analysis
For my task I am training a model to classify text as AI-generated or human-written, you need sources that provide a clear distinction between AI and human text while covering diverse writing styles and topics.
Best Sources for AI vs. Human Classification
What you do is look at the sources you have and query the web or an LLM for information about them. For this dataset contents I found:
-
HC3 (Helpful Conversations with Chatbots)
- Why? Explicitly designed for AI vs. human comparison. Contains both AI-generated and human-written responses, making it a goldmine for classification.
-
M4GT (Massively Multi-Source Generative Text Dataset)
- Why? A dataset designed to benchmark AI text generation, likely containing AI-written samples.
Best Sub-Sources to Include
- Wikipedia/News-Based Sub-Sources (e.g.,
'wikipedia','News/Wikipedia','arxiv','id_newspaper_2018')- Why? These contain high-quality, fact-based human-written text, useful as strong human examples.
Final Selection for AI vs. Human Text Classification
Good sources: 'hc3', 'm4gt'
Best sub-sources: 'open_qa', 'wikipedia', 'News/Wikipedia', 'arxiv', 'id_newspaper_2018'
Models 'gpt4', 'gpt-3.5-turbo', 'gpt_j', 'gpt4o'
Language 'en'
Text Length '< 2000'
# Define the selected sources and sub-sources
selected_sources = {'hc3', 'm4gt'}
selected_sub_sources = {'wikipedia', 'News/Wikipedia', 'arxiv', 'id_newspaper_2018'}
select_models = {'gpt4', 'gpt-3.5-turbo', 'gpt_j', 'gpt4o'}

# Apply the filter
filtered_train = dataset["train"].filter(lambda x:
    x["source"] in selected_sources and
    x["sub_source"] in selected_sub_sources and
    x["model"] in select_models and
    x["lang"] == "en" and  # Keep only English text
    len(x["text"]) <= 2000
)

filtered_val = dataset["validation"].filter(lambda x:
    x["source"] in selected_sources and
    x["sub_source"] in selected_sub_sources and
    x["model"] in select_models and
    x["lang"] == "en" and  # Keep only English text
    len(x["text"]) <= 2000
)

# Check new dataset size
print(f"Filtered train size: {len(filtered_train)}")
print(f"Filtered validation size: {len(filtered_val)}")
Filter: 100%|██████████| 674083/674083 [00:03<00:00, 198703.42 examples/s]
Filter: 100%|██████████| 288894/288894 [00:01<00:00, 198426.43 examples/s]Filtered train size: 7911
Filtered validation size: 3477
After filtering, we reduced the dataset from 674,083 samples to 7,911 training examples. I wanted to filter out the latest OpenAI models, English text only, and I kept the text length under 2000 characters.
Add back in our Human data
# Filter human-written text (label == 0)
filtered_human_train = dataset["train"].filter(lambda x:
    x["label"] == 0 and  # Only human-written
    x["lang"] == "en" and  # Keep only English text
    len(x["text"]) <= 2000  # Limit text length
)

filtered_human_val = dataset["validation"].filter(lambda x:
    x["label"] == 0 and
    x["lang"] == "en" and
    len(x["text"]) <= 2000
)

# Find the minimum count to ensure a balanced dataset
num_train_samples = min(len(filtered_train), len(filtered_human_train))
num_val_samples = min(len(filtered_val), len(filtered_human_val))

# Sample human examples to match AI count
balanced_human_train = filtered_human_train.shuffle(seed=42).select(range(num_train_samples))
balanced_human_val = filtered_human_val.shuffle(seed=42).select(range(num_val_samples))

# Check new dataset size
print(f"Filtered human train size: {len(balanced_human_train)}")
print(f"Filtered human validation size: {len(balanced_human_val)}")
Filter: 100%|██████████| 674083/674083 [00:03<00:00, 193552.39 examples/s]
Filter: 100%|██████████| 288894/288894 [00:01<00:00, 199475.22 examples/s]
Filtered human train size: 7911
Filtered human validation size: 3477
Merge the human back in
from datasets import concatenate_datasets

# Merge AI and Human examples for train and validation
final_train = concatenate_datasets([filtered_train, balanced_human_train]).shuffle(seed=42)
final_val = concatenate_datasets([filtered_val, balanced_human_val]).shuffle(seed=42)

# Check the distribution
print(f"Final train size: {len(final_train)} (AI + Human)")
print(f"Final validation size: {len(final_val)} (AI + Human)")
print("✅ Final datasets created and shuffled")
Save this filtered dataset
from datasets import DatasetDict

final_dataset = DatasetDict({
    "train": final_train,
    "validation": final_val
})

final_dataset.save_to_disk("ai_text_dataset")
This will save a folder ai_text_dataset with two directories text and validation:
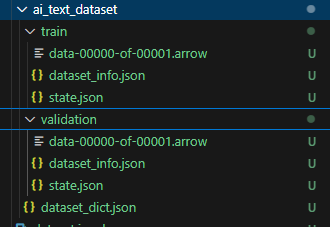
You will get a folder ai_text_dataset/ with the following contents:
ai_text_dataset/
│── dataset_info.json
│── train/
│   ├── dataset.arrow
│   ├── dataset_info.json
│   ├── state.json
│── validation/
│   ├── dataset.arrow
│   ├── dataset_info.json
│   ├── state.json
Explanation of Each File
| File/Folder | Description |
|---|---|
dataset_info.json |
Contains metadata about the dataset (e.g., schema, creation date). |
train/ and validation/ |
Separate folders for train and validation splits. |
train/dataset.arrow |
Binary file storing the actual dataset (Apache Arrow format). |
train/dataset_info.json |
Metadata for the training dataset split (features, types). |
train/state.json |
Keeps track of the dataset state (useful for resumption and shuffling). |
validation/dataset.arrow |
Binary file storing the validation set. |
validation/dataset_info.json |
Metadata for validation. |
validation/state.json |
Tracks dataset modifications. |
Understanding .arrow Files
- The
.arrowfiles contain the dataset in a highly optimized, columnar binary format (Apache Arrow). - These files allow fast loading and efficient storage.
- Unlike CSVs, they retain data types (e.g., string, integer, float) for better performance.
Loading the Saved Dataset
Once saved, you can reload the dataset using:
from datasets import load_from_disk

# Load dataset from disk
loaded_dataset = load_from_disk("ai_text_dataset")

# Check dataset structure
print(loaded_dataset)
DatasetDict({
    train: Dataset({
        features: ['id', 'source', 'sub_source', 'lang', 'model', 'label', 'text'],
        num_rows: 15822
    })
    validation: Dataset({
        features: ['id', 'source', 'sub_source', 'lang', 'model', 'label', 'text'],
        num_rows: 6954
    })
})
Using the Hugging Face cli tool
Install the Hugging Face CLI
If you haven’t installed it yet, run:
pip install huggingface_hub
Then, log in to your Hugging Face account:
huggingface-cli login
You’ll be prompted to enter your Hugging Face API token, which you can get from: Hugging Face Settings.
Using the Hugging Face CLI to Download a Dataset
The Hugging Face CLI allows you to directly download datasets to your local machine without writing Python code. It can be faster for large datasets.
Find and Download a Dataset
To find a dataset, go to Hugging Face Datasets.
To download a dataset, use:
huggingface-cli download --repo-type dataset 1-800-SHARED-TASKS/COLING-2025-GENAI-MULTI
Note: When downloading a dataset you need to set the --repo-type dataset flag.
This downloads the dataset to your local cache.
How to Review Your Local Cache Directory in Hugging Face CLI
The Hugging Face CLI stores downloaded models and datasets in a cache directory to avoid re-downloading files. You can find this directory using the following commands.
Method 1: Use the Hugging Face CLI Command
Run this in your terminal:
huggingface-cli scan-cache
| REPO ID | REPO TYPE | SIZE ON DISK | NB FILES | LAST_ACCESSED | LAST_MODIFIED | REFS | LOCAL PATH |
|---|---|---|---|---|---|---|---|
| 1-800-SHARED-TASKS/COLING-2025-GENAI-MULTI | dataset | 1.5G | 3 | 2 days ago | 2 days ago | main | E:\huggingface_models\hub\datasets–1-800-SHARED-TASKS–COLING-2025-GENAI-MULTI |
| Hello-SimpleAI/HC3 | dataset | 146.9M | 9 | 4 days ago | 4 days ago | main | E:\huggingface_models\hub\datasets–Hello-SimpleAI–HC3 |
| HuggingFaceH4/ultrafeedback_binarized | dataset | 424.1M | 6 | 2 weeks ago | 2 weeks ago | main | E:\huggingface_models\hub\datasets–HuggingFaceH4–ultrafeedback_binarized |
| NicolaiSivesind/human-vs-machine | dataset | 14.4M | 5 | 2 days ago | 3 days ago | main | E:\huggingface_models\hub\datasets–NicolaiSivesind–human-vs-machine |
| vblagoje/PubMedQA_instruction | dataset | 274.8M | 3 | 2 weeks ago | 2 weeks ago | main | E:\huggingface_models\hub\datasets–vblagoje–PubMedQA_instruction |
Changing you Hugging Face cache location
Use the environment variable HF_HOME to fix where you want this cache to be located.
Using Git to add our new dataset to Hugging Face
Hugging Face repositories function like GitHub repositories. By using Git, you can version datasets, track changes, and collaborate on dataset updates.
I created a repo to store our new dataset:
We can clone this locally to work with it
git clone https://huggingface.co/datasets/ernanhughes/ai-human
cd ai-human
Export csv file from our final DataSet
We can export csv files for out datasets.
# Convert to Pandas DataFrames
train_df = filtered_dataset["train"].to_pandas()
validation_df = filtered_dataset["validation"].to_pandas()

# Save as CSV
train_df.to_csv("train.csv", index=False)
validation_df.to_csv("validation.csv", index=False)

print("✅ CSV files saved: train.csv, validation.csv")
Adding data to our Hugging Face dataset
We can use the Hugging Face website to upload these file or we can use git. Now we can use this dataset in our applications
import pandas as pd
from datasets import load_dataset

dataset = load_dataset("ernanhughes/ai-human")
print(dataset)
DatasetDict({
    train: Dataset({
        features: ['id', 'source', 'sub_source', 'lang', 'model', 'label', 'text'],
        num_rows: 15822
    })
    validation: Dataset({
        features: ['id', 'source', 'sub_source', 'lang', 'model', 'label', 'text'],
        num_rows: 6954
    })
})
Updating our Dataset card
Using the Hugging Face website you can add or update the card for your dataset.
This consists of adding some special formatting to the README.md file in your repo.
References
1️⃣ Hugging Face Datasets Documentation 2️⃣ Pandas Documentation 3️⃣ Apache Arrow Documentation
Conclusion
In this post we learned how to
- Load Datasets from Hugging Face
- Process, filter, and refine the data obtained from these datasets
- We looked at how we would analyze a dataset to determine whether it would fit our purposes of not
- We learned how to save that dataset locally
- We learned how to export files from a dataset
- We learned how to create our own DataSets on Hugging Face