Mastering LLM Fine-Tuning: A Practical Guide with LLaMA-Factory and LoRA
Summary
Large Language Models (LLMs) offer immense potential, but realizing that potential often requires fine-tuning them on task-specific data. This guide provides a comprehensive overview of LLM fine-tuning, focusing on practical implementation with LLaMA-Factory and the powerful LoRA technique.
What is Fine-Tuning?
Fine-tuning adapts a pre-trained model to a new, specific task or dataset. It leverages the general knowledge already learned by the model from a massive dataset (source domain) and refines it with a smaller, more specialized dataset (target domain). This approach saves time, resources, and data while often achieving superior performance.
Why Fine-Tune LLMs?
- Leverage Pre-trained Knowledge: LLMs are trained on vast datasets, acquiring rich representations of language. Fine-tuning builds upon this existing knowledge, avoiding the need to train from scratch.
- Reduced Data Requirements: Fine-tuning often requires significantly less labeled data than training a model from the ground up.
- Improved Performance: Fine-tuning allows the model to specialize in the target task, leading to better results compared to zero-shot or few-shot learning.
- Faster Convergence: Pre-trained models converge faster during fine-tuning, requiring fewer training epochs.
- Domain-Specific Adaptation: Fine-tuning enables adaptation to niche domains with unique data characteristics.
How Fine-Tuning Works
- Select a Pre-trained Model: Choose an LLM relevant to your task (e.g., LLaMA, Mistral, etc.).
- Prepare your Dataset: Format your data appropriately for the task (e.g., instruction following, text generation, etc.). LLaMA-Factory offers example datasets for reference.
- Configure Training: Define training parameters (learning rate, batch size, epochs, etc.) in a configuration file (YAML) or through the LLaMA-Factory UI.
- Fine-tune the Model: Use a tool like LLaMA-Factory or custom scripts to perform the fine-tuning.
- Evaluate: Assess the model’s performance on a held-out dataset.
- Deploy: Integrate the fine-tuned model into your application.
Introducing (LoRA): Efficient Fine-Tuning
Low-Rank Adaptation (LoRA) is a parameter-efficient fine-tuning technique. Instead of updating all model weights, LoRA freezes the pre-trained weights and injects trainable rank-decomposed matrices into each layer of the Transformer architecture. This dramatically reduces the number of trainable parameters, leading to:
- Faster Training: Fewer parameters to update.
- Lower Memory Usage: Reduces GPU memory requirements.
- Improved Stability: Preserves pre-trained knowledge.
LLaMA-Factory: The best Fine-Tuning tool available
LLaMA-Factory simplifies the fine-tuning process. Its key features include:
- User-Friendly Interface: Easy-to-use scripts and a web UI for configuration and training.
- Dataset Support: Handles various data formats and allows custom dataset integration.
- Comprehensive Parameter Management: Control over essential training parameters.
- Hugging Face Integration: Leverages the
transformerslibrary. - Built-in LoRA Support: Streamlines LoRA fine-tuning.
Installing and Using LLaMA-Factory
-
Environment Setup: LLaMA-Factory is best run within a Linux environment. WSL2 with Ubuntu is a good option for Windows users. Docker is also supported.
-
Clone the Repository:
git clone [https://github.com/hiyouga/LLaMA-Factory.git](https://github.com/hiyouga/LLaMA-Factory.git)
cd LLaMA-Factory
- Docker Setup (Recommended): Using Docker simplifies dependency management.
I had to use docker and wsl because the NVIDIA container toolkit only supports linux. This is required to run gpu operations in containers.
cd docker/docker-cuda  # Or docker/docker-cpu if you're not using a GPU
docker compose up -d
docker compose exec llamafactory bash # Enter the container
- Run the Web UI (within the container):
llamafactory-cli webui
-
Access the UI: Open your browser and go to
http://localhost:7860/. -
Prepare Your Data: Refer to the example datasets provided within LLaMA-Factory for formatting guidelines. The “Preview Dataset” feature is very helpful.
-
Fine-Tuning with the UI:
- Navigate to the “Fine-tuning” tab.
- Select your model (e.g., a compatible LLaMA variant or other supported models).
- Choose your dataset.
- Configure training parameters (including LoRA settings).
- Start the training process.
-
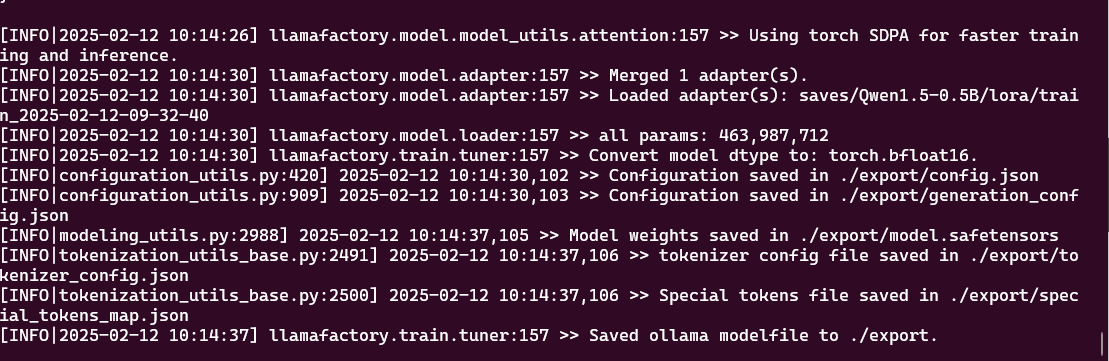
Export the Model: Once training is complete, export the fine-tuned model for use in your applications.
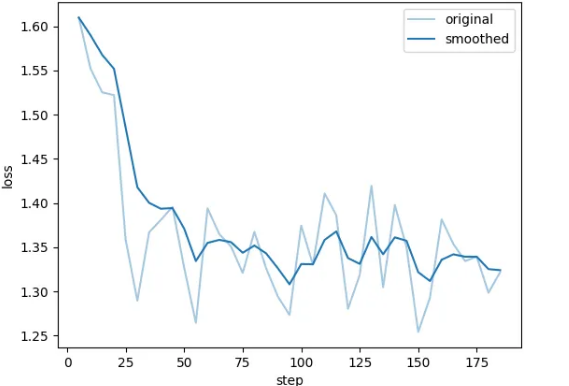
Example Fine-Tuning Process with LLaMA-Factory
- Model Selection: Choose a base model (e.g.,
Qwen/Qwen1.5-0.5Bfor a smaller model). - Dataset Selection: Use a relevant dataset (e.g.,
apaca_en_demo). - Configuration: Configure the training parameters, including LoRA settings (rank
r,lora_alpha,lora_dropout). - Training: Start the fine-tuning process.
- Export: Export the trained model.
LoRA Fine-Tuning with Raw Python (Advanced)
While LLaMA-Factory is highly recommended, sometimes you may need a more customized solution. Here’s an example of performing LoRA fine-tuning using raw Python and the peft library:
**1️⃣ Load Pretrained Model and Tokenizer
import torch
from transformers import AutoModelForCausalLM, AutoTokenizer, TrainingArguments, DataCollatorForLanguageModeling
from peft import get_peft_model, LoraConfig, TaskType
from datasets import Dataset
import json
import numpy as np

model_name = "mistralai/Mistral-7B-v0.1"  # Or another suitable model
tokenizer = AutoTokenizer.from_pretrained(model_name)
model = AutoModelForCausalLM.from_pretrained(model_name, load_in_8bit=True, device_map="auto")
**2️⃣ Configure LoRA
lora_config = LoraConfig(
    task_type=TaskType.CAUSAL_LM,
    inference_mode=False,
    r=16,
    lora_alpha=32,
    lora_dropout=0.05,
    target_modules=["q_proj", "v_proj"]  # Apply LoRA to attention layers (adjust if needed)
)
model = get_peft_model(model, lora_config)
model.print_trainable_parameters()
**3️⃣ Prepare the Dataset
with open("fine_tuning_data.json", "r") as f: # Your data in json format
    training_data = json.load(f)
hf_dataset = Dataset.from_list(training_data)

def tokenize_function(example):
    inputs = tokenizer(example["input"], truncation=True, padding="max_length", max_length=512)
    outputs = tokenizer(example["output"], truncation=True, padding="max_length", max_length=128)
    inputs["labels"] = outputs["input_ids"]
    return inputs

tokenized_dataset = hf_dataset.map(tokenize_function, batched=True)
**4️⃣ Set Up Training Arguments
training_args = TrainingArguments(
    output_dir="./fine-tuned-mistral",
    per_device_train_batch_size=4,
    per_device_eval_batch_size=4,
    gradient_accumulation_steps=4,
    learning_rate=2e-4,
    weight_decay=0.01,
    num_train_epochs=3,
    logging_dir="./logs",
    save_strategy="epoch",
    evaluation_strategy="epoch",
    report_to="none",
    fp16=True,
    optim="adamw_bnb_8bit"
)
**5️⃣ Set up a Data Collator
data_collator = DataCollatorForLanguageModeling(tokenizer=tokenizer, mlm=False)
**6️⃣ Train the Model
trainer = Trainer(
    model=model,
    args=training_args,
    train_dataset=tokenized_dataset,
    eval_dataset=tokenized_dataset,
    tokenizer=tokenizer,
    data_collator=data_collator
)

trainer.train()
**7️⃣ Save the Fine-Tuned Model
trainer.save_model("./fine-tuned-mistral")
tokenizer.save_pretrained("./fine-tuned-mistral")

print("Fine-tuning complete! Model saved.")
**8️⃣ Inference Example
from transformers import pipeline

forecast_model = pipeline(
    "text-generation",
    model="./fine-tuned-mistral",
    tokenizer=tokenizer,
    device=0  # Specify GPU device if available
)

question = "Will the S&P 500 exceed 6000 before June 2025?"
news_summary = "Recent news reports suggest a surge in accumulation of stocks."

prompt = f"Given the question: {question}\nNews: {news_summary}\nPredict the probability (0 to 1)."

output = forecast_model(prompt, max_length=50, do_sample=True)
print("Forecast:", output[0]["generated_text"])
**9️⃣ Evaluation
The Brier Score measures the accuracy of probabilistic forecasts. A lower score indicates better performance, making it a useful metric for evaluating our model’s predictions.
def brier_score(predictions, outcomes):
    return np.mean((np.array(predictions) - np.array(outcomes)) ** 2)

# Simulated predictions (replace with your model's predictions)
predictions = [0.7, 0.6, 0.85, 0.3, 0.55]
actual_outcomes = [1, 1, 1, 0, 0]

brier = brier_score(predictions, actual_outcomes)
print(f"Brier Score after fine-tuning: {brier:.4f}")